Quick Facts
- Native Hardware: 14-inch and 16-inch MacBook Pro models feature a six-speaker system with four force-canceling woofers.
- DAC Performance: The internal digital-to-analog converter supports high-resolution sample rates up to 96 kHz natively.
- Power Output: Recent models provide up to 3 volts RMS for high-impedance headphones via DC load detection.
- Software EQ: A 10-band native equalizer is accessible within the macOS Music app environment.
- Pro Tooling: The Audio MIDI Setup utility allows for manual control over bit depth and sampling frequency.
- Production Logic: Optimizing system resources like FileVault and Time Machine is essential for low-latency recording.
To manage your macbook audio settings, navigate to System Settings and select Sound. From the Output tab, you can switch between built-in speakers, wired headphones, and external devices. Within this menu, you can also adjust the master volume, stereo balance, and alert sound levels. For more technical configurations, the Audio MIDI Setup utility allows users to manually set sample rates and bit depths to match high-resolution audio hardware.
Navigating Basic Sound Output and Alerts
For most users, the journey into higher audio fidelity begins with the basic interface. In the modern macOS environment, the primary hub for device management is found within the System Settings. When you need to determine how to change audio output on mac, this is your first stop. The Output tab lists every available device, from the internal speakers to connected Bluetooth monitors or USB interfaces.
A common frustration for many users is the intrusion of system notifications while listening to music or participating in a high-stakes video call. You can adjust macbook alert sound volume independently from the master system volume. By selecting a dedicated Alert sound and lowering its specific slider, you ensure that emails and messages do not pierce through your carefully curated playlist at maximum volume.
Beyond the volume sliders, macOS provides a basic stereo balance control. While it is usually best left centered for a symmetrical listening experience, it is an essential tool for troubleshooting hardware issues or compensating for specific room acoustics where one speaker might be physically obstructed.
Mastering the MacBook Music App Equalizer
While it is a common complaint that macOS lacks a system-wide equalizer in its core settings, the Music app remains a powerful tool for those who primarily use Apple's ecosystem for their library. To access the macbook music app equalizer settings, you must have the app open and navigate to the Window menu, then select Equalizer. Alternatively, you can use the keyboard shortcut Option + Command + E.
This 10-band interface allows for precise control over frequency bands ranging from 32Hz to 16kHz. If you find your speakers sounding a bit thin, a slight lift in the 32Hz and 64Hz bands can add much-needed warmth. Conversely, for dialogue-heavy content, a boost in the 1kHz to 4kHz range can significantly improve clarity. The app includes 22 genre-specific presets, which serve as excellent starting points for those who do not wish to manually tweak sliders.
One often overlooked feature within the Music app playback settings is the Sound Enhancer. When enabled, this digital signal processing (DSP) effect alters the phase relationship of the stereo channels to widen the perceived soundstage. For listeners using the built-in speakers, this can make the audio feel as though it is coming from well beyond the physical chassis of the laptop.
Comparison: Native EQ vs. Third-Party Solutions
| Feature | Music App (Native) | Third-Party (e.g., Boom 3D) |
|---|---|---|
| System-wide Application | No (Music app only) | Yes (All apps, browsers, games) |
| Band Control | 10-band fixed | Variable (often 31-band) |
| Spatial Audio | Standard Stereo/Atmos | Proprietary 3D Surround Virtualization |
| Gain Boosting | Pre-amp slider only | Global gain amplification |
| Cost | Free / Included | Subscription or One-time Purchase |
Advanced Setup: Audio MIDI Utility for High-Resolution Sound
For the audiophile or the professional, the standard system settings are merely the surface. macOS hides its most powerful mac advanced sound settings within a utility called Audio MIDI Setup. You can find this by using Spotlight (Command + Space) or looking in the Utilities folder within your Applications.
This is where you unlock the true power of the hardware. The integrated digital-to-analog converter (DAC) in modern MacBook Pro laptops supports high-resolution sample rates up to 96 kHz, allowing for full-resolution audio monitoring without external hardware. By default, macOS often sets the output to 44.1 kHz or 48 kHz to match standard video content. However, if you are listening to lossless files or high-res streams, you should manually adjust the format to 96.0 kHz and 24-bit (or 32-bit float) to ensure no downsampling is occurring.
The 3.5 mm headphone jack on 2021 and newer MacBook Pro models is particularly impressive. It includes DC load detection that automatically adjusts output voltage, delivering up to 3 volts RMS for high-impedance headphones between 150 and 1,000 ohms. This eliminates the need for a secondary amplifier for many studio-grade headphones. However, if your workflow demands even higher sample rates, such as 192 kHz or DSD, an external DAC setup for macbook users remains the gold standard. When connecting an external USB-C DAC/AMP, ensure you return to Audio MIDI Setup to verify the device is recognized and configured to its maximum supported bit depth.
Professional Audio Production System Optimization
When you move from passive listening to active creation, macbook pro audio settings become a matter of stability and performance. Professional macos audio production system optimization requires a clean environment where background processes do not interfere with the Core Audio engine.
The most common issue creators face is latency, the delay between a sound being made and it being processed by the computer. To fix macbook audio popping and crackling, which are often symptoms of a CPU being pushed too hard or a buffer size set too low, you must manage your "resource hygiene."
Resource Hygiene Checklist for Audio Creators:
- Disable Time Machine: Automatic backups can cause sudden spikes in disk activity, leading to buffer underruns.
- Turn off FileVault: While secure, the real-time encryption can add overhead during high-track-count playbacks.
- Shut down Analytics: Background system reporting can occasionally interrupt the audio stream.
- Adjust Buffer Size: Within your Digital Audio Workstation (DAW), set the buffer to 128 or 256 samples for recording, and 1024 samples for mixing.
- Wired Connections: Whenever possible, use wired peripherals rather than Bluetooth to reduce interference and latency.
By following these steps, you ensure that the Core Audio drivers have a stable path to process data, which is critical for maintaining professional-grade mac advanced sound settings during a live session.
Hardware Safety and Maintenance
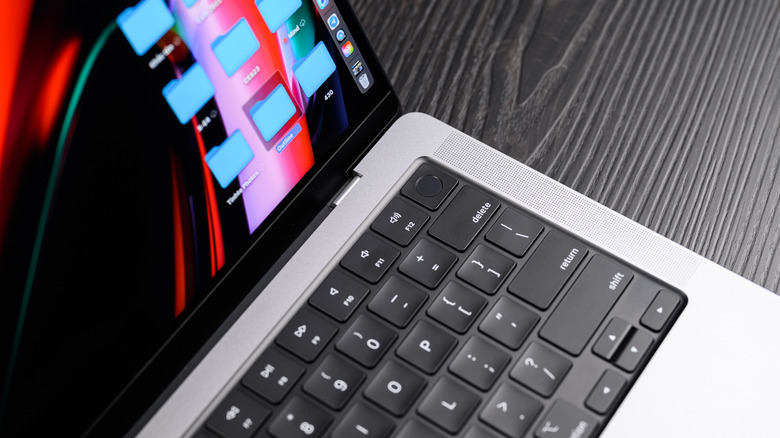
Even the most optimized macbook audio settings cannot compensate for hardware that is physically compromised. The high-fidelity six-speaker sound system in 14-inch and 16-inch MacBook Pro models features two tweeters and four force-cancelling woofers that provide up to 80 percent more bass than previous generations. These woofers move a significant amount of air, and keeping the speaker grills clear of dust and debris is essential for maintaining acoustic transparency.
Safety Warning: Be extremely cautious when using third-party applications designed to "boost" your volume beyond 100%. While these apps can provide extra gain for quiet recordings, they can easily drive the built-in speakers into clipping territory. Over-extending the force-canceling woofers can lead to permanent driver fatigue or physical tearing of the speaker cone, which is an expensive repair involving the entire top case of the MacBook.
Always monitor your levels. If you hear any distortion or mechanical rattling, immediately decrease the volume. The goal of optimization is clarity and accuracy, not sheer volume at the expense of hardware longevity.
FAQ
How do I get to the audio settings on my Mac?
You can access your settings by clicking the Apple logo in the top-left corner of your screen, selecting System Settings, and then clicking on the Sound icon in the sidebar. For technical adjustments, use the Audio MIDI Setup utility found in the Applications > Utilities folder.
How to get the best audio quality on Mac?
To achieve the best quality, use high-quality wired headphones or external monitors. Navigate to Audio MIDI Setup and ensure your output format is set to at least 24-bit/96kHz. If you are using the Music app, enable Lossless Audio in the playback preferences and ensure the Sound Enhancer is tuned to your liking.
How to fix audio Output settings?
If your audio is not routing correctly, go to System Settings > Sound > Output and manually select your desired device. If the device does not appear, try unplugging and re-plugging the hardware or restarting the Core Audio process via Terminal using the command sudo killall coreaudiod.
How to enhance MacBook audio?
You can enhance the built-in sound by using the mac sound settings equalizer within the Music app. For a system-wide improvement across all apps, consider a third-party equalizer like Boom 3D or SoundSource, which provides more granular control over frequency bands and spatial effects.
How do I improve my audio quality?
Improving audio quality is a combination of hardware and software. Use a high-quality external DAC setup for macbook for the cleanest signal. Additionally, keep your macOS updated to ensure you have the latest drivers for Core Audio and minimize background tasks that might cause interference or jitter.